Managing Profiles
In the below sections, we'll explain how to manage profiles: how to create, activate, rename, or delete them. If you'd prefer to watch a demo of all that, here's a video:
Video length: 56sec
Creating Profiles
There are two ways to create Profiles: through the software, or the website.
Creating Profiles on the website
In the website, you can create a profile by going to your profile management page and clicking the New Profile button. Enter the name you'd like to give this new profile and click the OK button. See your new profile pop up in the table!
The WhatPulse software automatically syncs with the website after it has pulsed, so you can create a profile on the website, pulse, and then use it in the software in a few minutes.
Creating Profiles in the software
In the software, Profiles are created in the Settings section of the WhatPulse software. Follow these steps to create a profile:
- Open WhatPulse and click the
Settingstab. - Scroll down to the
Profilessection, or click theProfilesmenu item in the left menu. - Click the
Addbutton. - Enter the name you'd like to give this new profile and click the
OKbutton. - See your new profile pop up in the table!
Activating Profiles
When activating a profile, statistics are attributed to that profile. So, whenever you start a project, activate the right profile and WhatPulse will start tracking time against your project.
To make it as easy as possible, you can activate profiles from a few different places.
1. The Profiles settings page
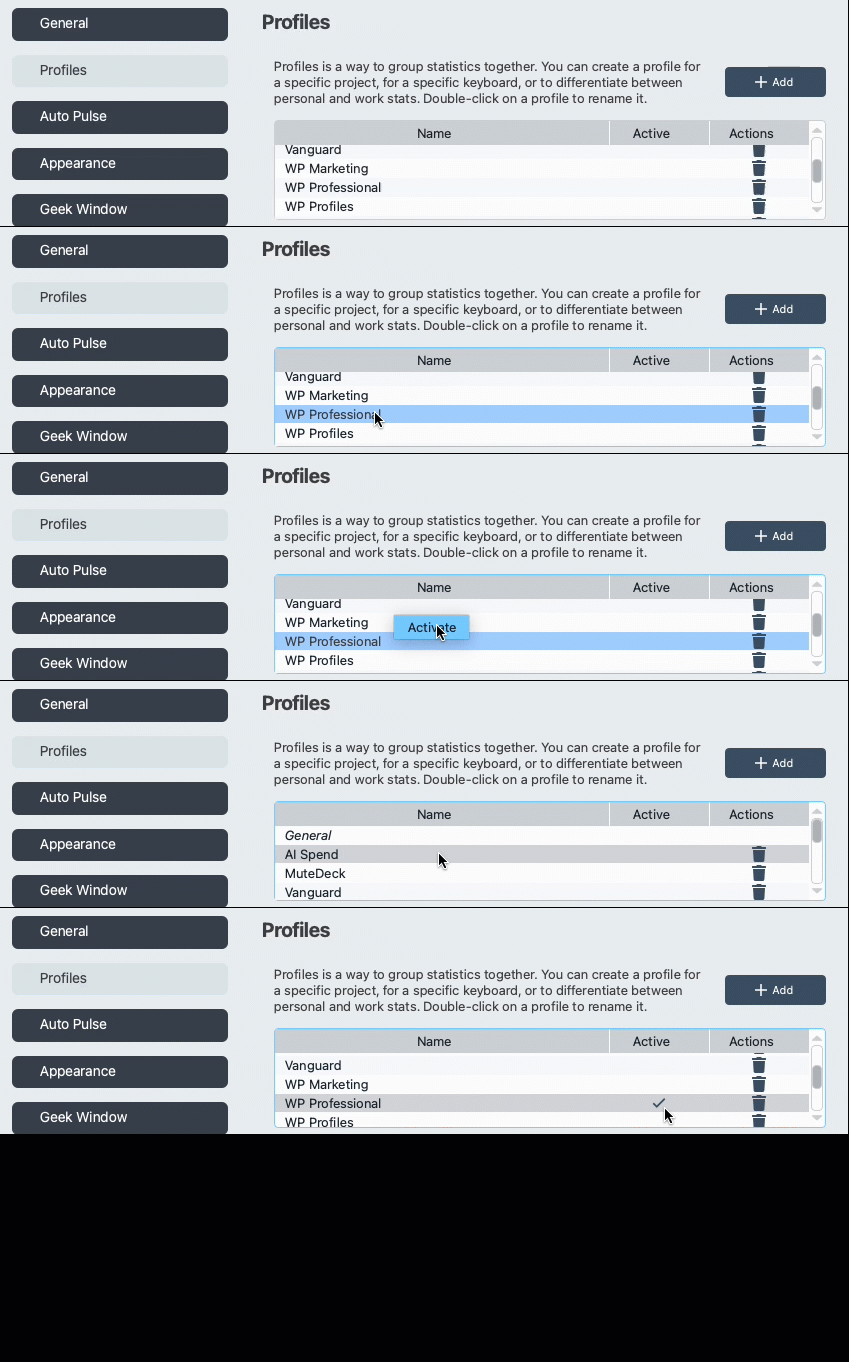
When you've got the profile settings open, right click on a profile and click Activate to activate the selected profile.
2. The system tray popup
Without having the main WhatPulse window open, you can activate a profile from the tray popup (click the tray icon, or menu bar icon on macOS).
- Click on the WhatPulse icon to open the popup.
- Click the profile chip in the bottom row. It reads
Activate a profilewhen no profile is active, or shows the name of the active one. - Click the profile you want to activate, and you're done! With six or more profiles, a search box appears to find the right one quickly.
Profiles that are managed by the website show a lock icon in the profile settings and cannot be edited or deleted from the app.

3. Via Stream Deck
If you have an Elgato Stream Deck, install the WhatPulse plugin to control your profiles and instantly see which profile is activated. Steps on how to set this up, are in the Stream Deck Plugin help section.
Deactivating Profiles
If you want to deactivate a profile and stop statistics attribution, you can activate the General profile.
Automatic profile resets
WhatPulse can switch you back to the default General profile automatically, so stepping away from your desk does not leave activity piling up under a work or game profile by mistake. Both options live at the bottom of the Profiles settings page:
- Reset to default profile on shutdown or sleep: on by default.
- Reset to default profile when the computer is locked: new in WhatPulse 6.3, on by default. Unlike sleep, locking your screen does not pause collection; your network traffic and uptime keep counting while you are away, just under the
Generalprofile. Lock detection is available on Windows and macOS.
Renaming Profiles
To rename a profile, go to the Profiles setting in the WhatPulse software, then double click on the profile to make its name editable. Enter the correct name and press enter to rename it.
Deleting Profiles
If you no longer need a profile and want to clean it up, you can delete a profile by clicking on the trashcan icon and confirming the deletion.
As the confirmation popup will tell you, deleting a profile does not delete its statistics. It moves the statistics that are attributed to the profile into the General profile, so they are not lost.